vasárnap, május 16

Sd.Kfz. 251/1 Ausf.D - part 9: Finished the building phase

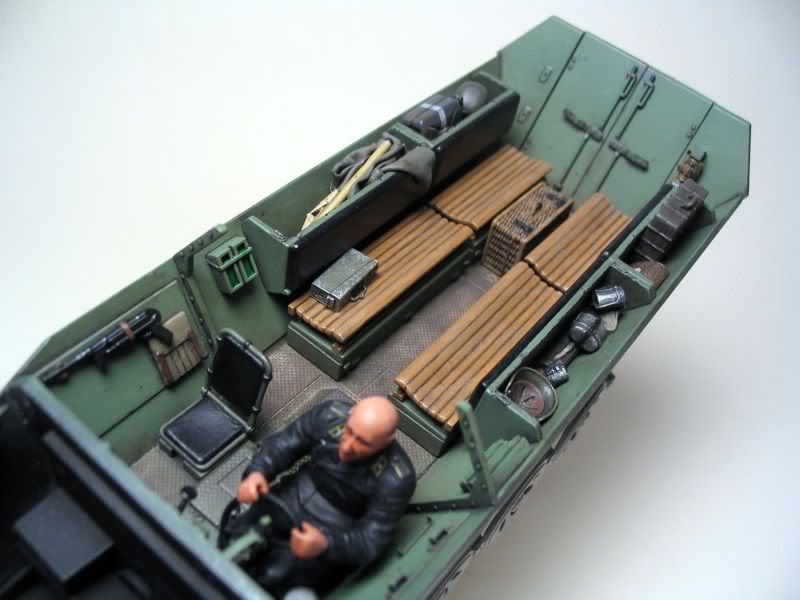
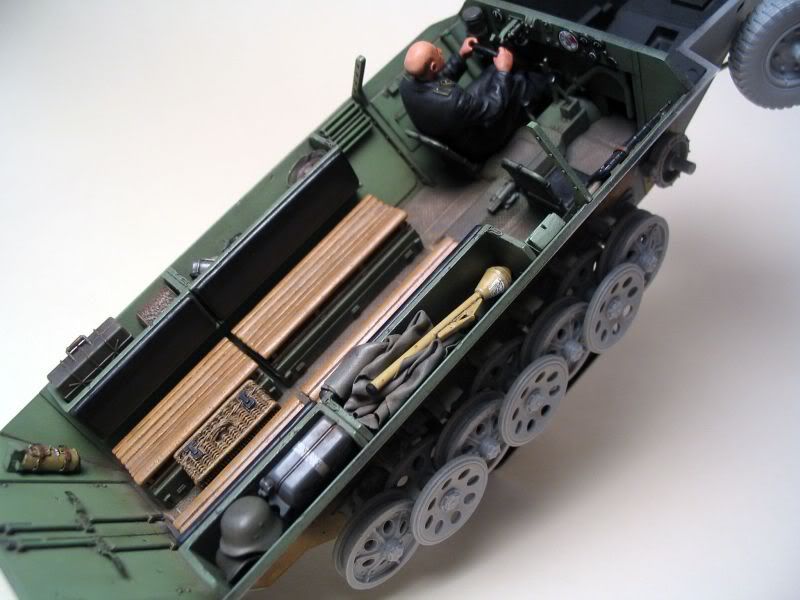
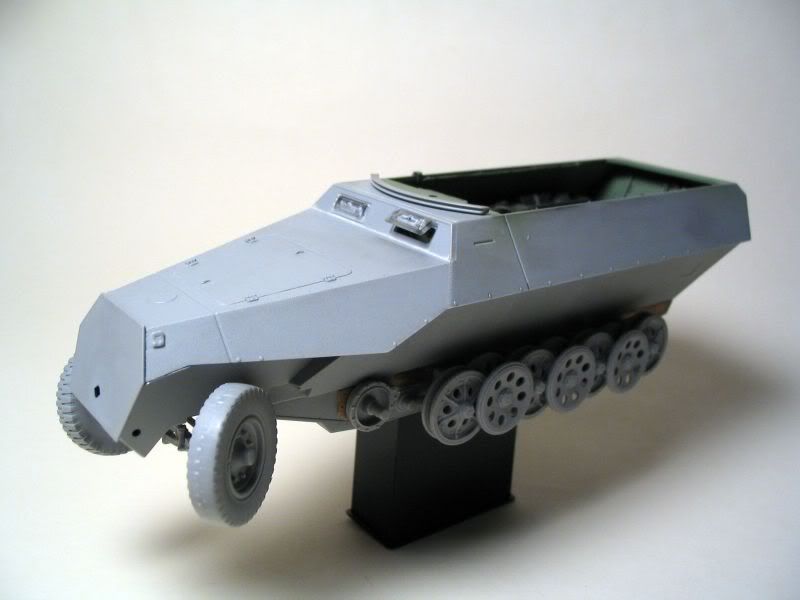
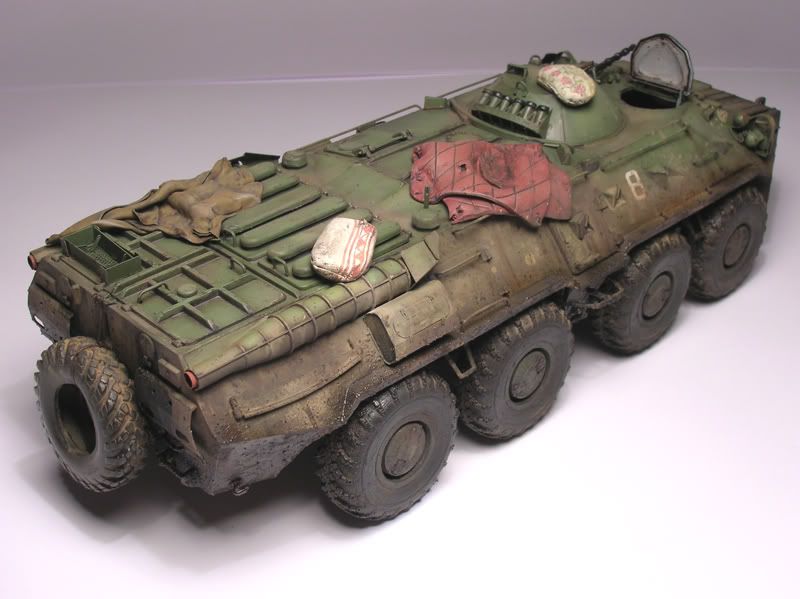
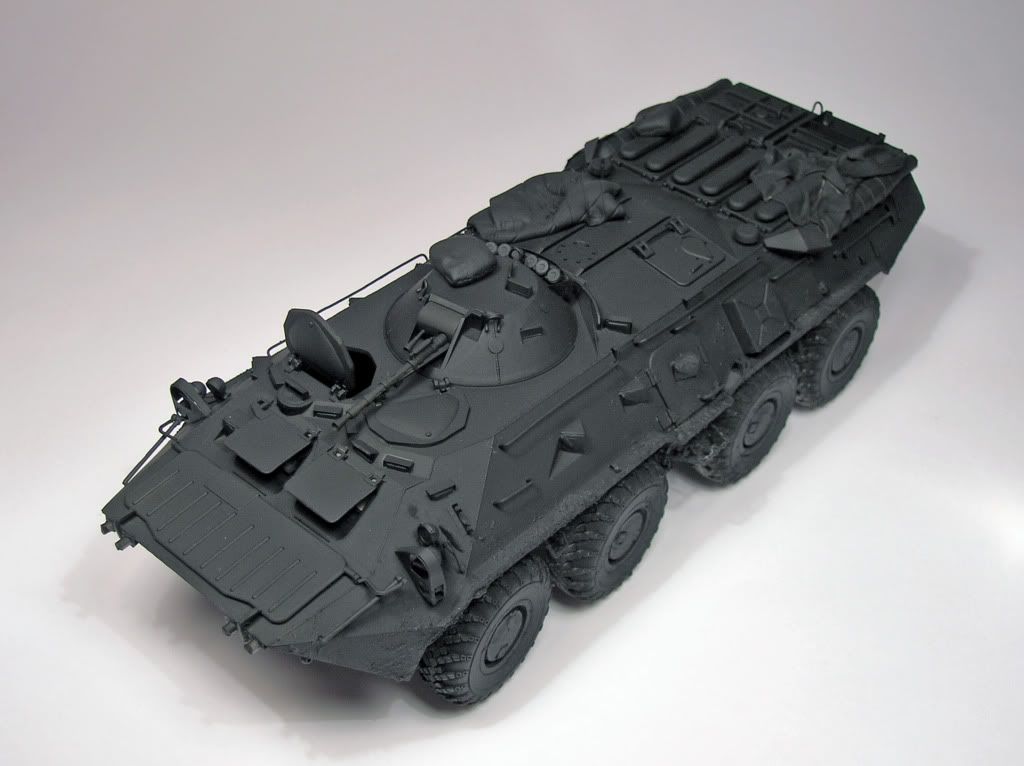
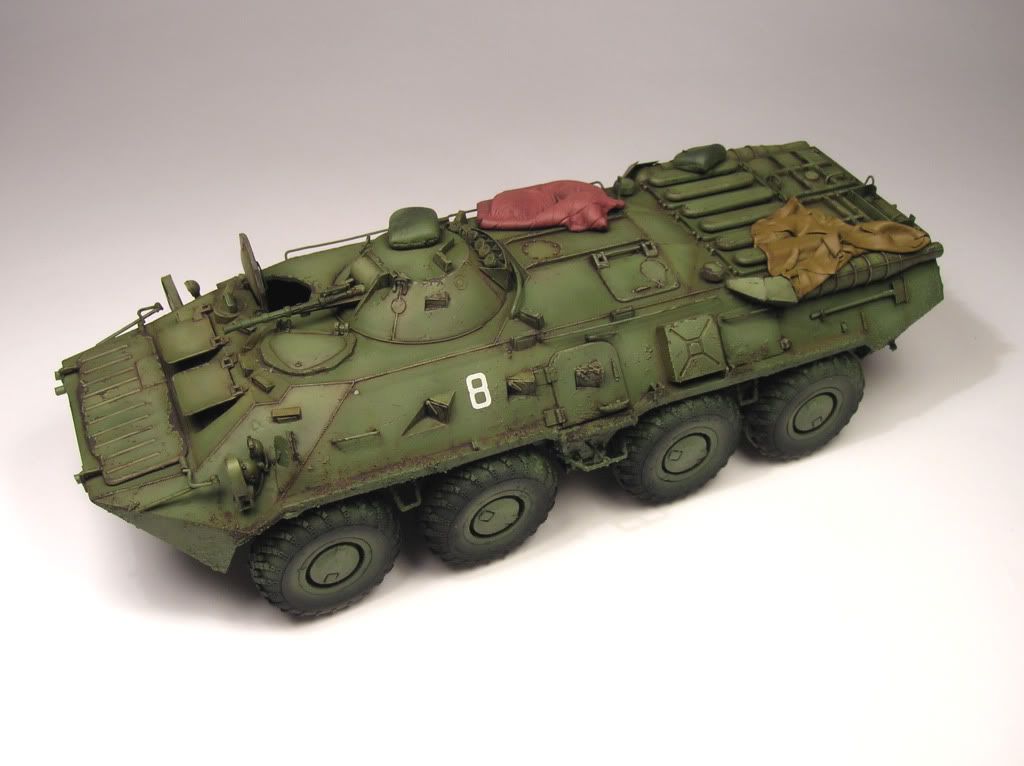
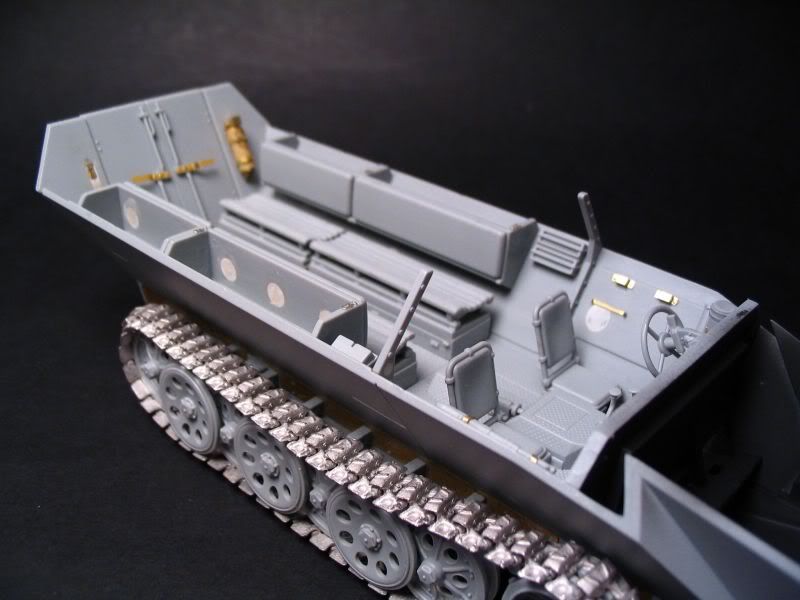
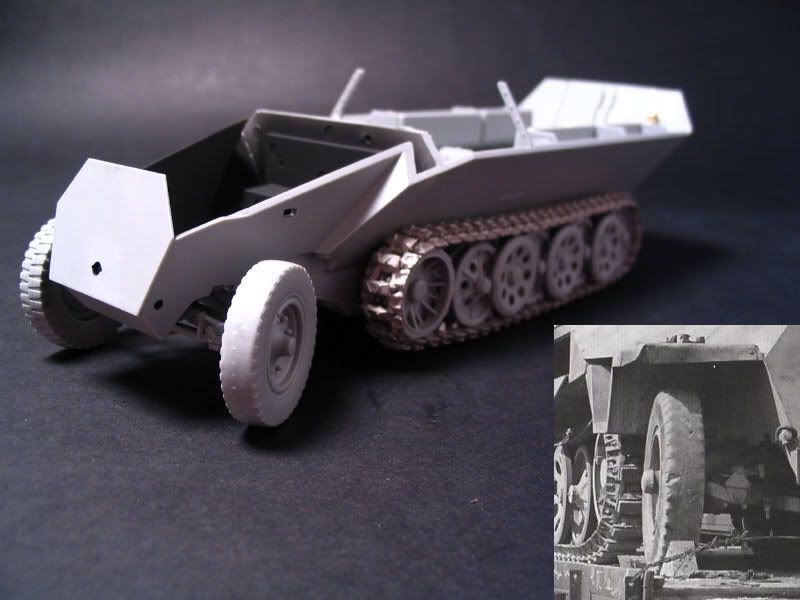
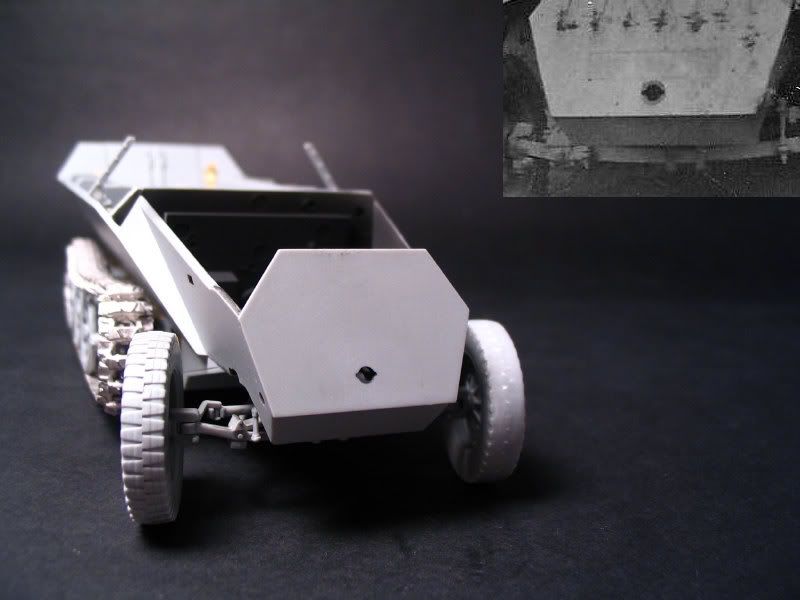
On this week I just added some little things to the almost completed vehicle. It has got the rear NOTEK light, the antenna mount, the MG bar on the back, and i changed the hooks at the front-side for PE ones. I used some "personal" items onto the halftrack example the shovel, the bucket and the towing cable. The sandbag MG42 "mount" is my old favorite since i saw it on an archive photo. 

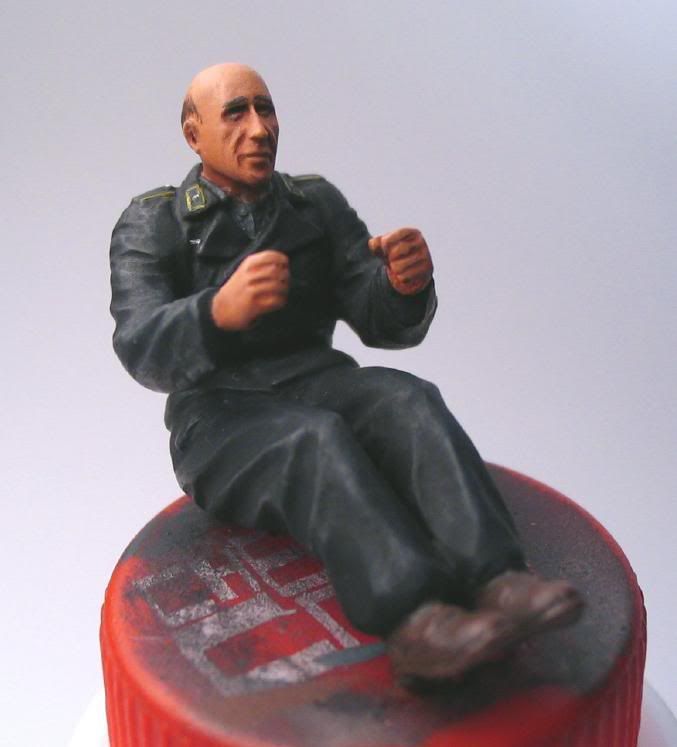
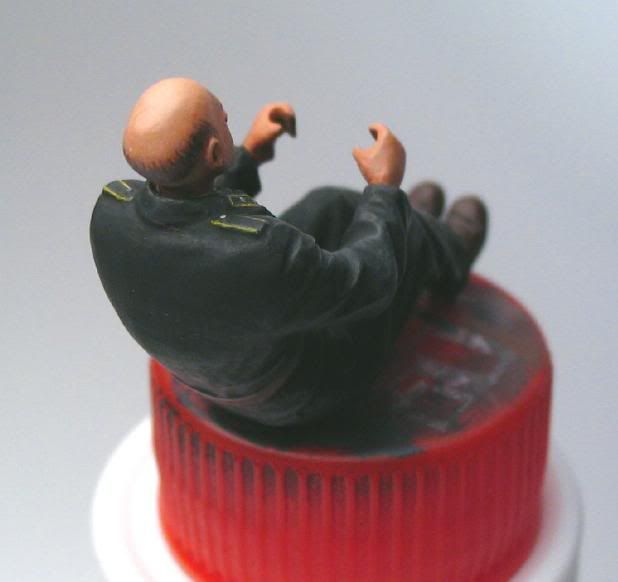
Well, the building process is nearly at the end, just a few things are missing, which will be on the right place when the figures get the final positions.

Here are the latest pics: 


szerda, május 5

Sd.Kfz. 251/1 Ausf.D - part 8: Exterior PE works...

First of all, sorry about the rarely updating, but everybody from the Club has a lot of work and very-very important family activity!!!

On the last week, I found time to make some PE parts on my halftrack. As you can see i dont like the fenders ;) I lost those on both side, but strictly based on archive photos. My first idea was to leave the right one, but i found it too one-sided...so i decided to make damage on the left one as well. The missed sidebox door on the left side is rather life-like as we can check on old photos. I had to make some shooting damage, and open ed door , although, hard to find pics from 251's in action, with opened side-door!

To finish the building process is so close... :)

Here are the pics:


hétfő, április 5

Sd.Kfz. 251/1 Ausf.D - part 7: The late war camo on 251's

As i promised, i want to show my research about the standard camouflage on the late war 251's. I studied a lot of archive pics from 1945 about 251s and found an interesting thing. Some of them had similar camo schemes, specially notes by the yellow patch ont he sides and the front. The camo-map based on the 251/21 Drilling with full of russians in Torgau, April 1945 (Panzerwrecks X and a videostream). The unidentified patches are from other halftrucks which has the very similar camo as you can see on the assorted photos below. Some things were clear up: green base, not hard edge just very smooth border of the camo, 90% the germans used this scheme on late engine decked vehicle, not 100% same camo on the 251s.
Here is the camo-map painted by me, please note that the black line around the patches means the soft edge painting.
(Photos from Panzerwreck series, T.Jakl:Kvéten 1945, and from Internet.)


kedd, március 30

Sd.Kfz. 251/1 Ausf.D - part 6: The interior is done

Finally i could finished the interior last night. 
Hans stayed in his position, but just his back show up. I always like those models which has a crew member inside the vehicle with just low visibilaty. For example a driver, who needs a lot of correction of the pose to fit him to the right place. This time the  figure has a hard-connection with the vehicle, and i think its more lifelike against as the crew just stand on the top of the tank.
I put some equipment into the side boxes, like the tarp, jerry-can, helmets, panzerfaust, granade-case, canteens.
I use oils and pigments for the weathering effects just softly.

And the time has come, i glued together the upper and the lower parts. I am so excited to painting the camo. By the way camo...as i promised i will show you the camo-map that i drew after studied a lot of photos!!!...soon  :)

(Sorry for the quality of the pics, but i have only 1 lamp right now ;) )


szombat, március 27

BTR-80 Battle of Grozny 1999-2000 (figures)

Figures on the way.
This is the first one. There will be six figures. Most of them in Flora camo, some of them in VSR and "shadow".
The figure was painted with vallejo acrylics, and got some oil wash. It is still far from finished. Russian uniforms oftenly have differences in the shades, so as a modeller it makes easyer to paint it.
In the second Chechen war Flora pattern was more commonly used then VSR but we can find several examples both of tham, amoung other camo patterns. The 6b3 flak vests had this borwnish biege color.

Russian Flora camo


kedd, március 16

BTR-80 Battle of Grozny 1999-2000 (part 3)

Finally I have finished the vehicle itself. I have tryed to capture the dirty look of these warmachines, seen on the archive photographs. The figures and base will be the next step.

csütörtök, február 18

Sd.Kfz. 251/1 Ausf.D - part 5: Painting the interior

Here are 2 shots of the interior, i have worked on, in the last 2 weeks. My modelling speed is too slow in nowdays, so the finish line should be over the next competitions date :(
As You can see, I finished to paint the basecoat, and the other equipment of the vehicle. The next step will be the weathering, like the chip paint, add dirt onto the floor and for the seat, and make some wear on the leather surfaces. 

Oh yesss, the base color is green, not ordinary for german halftruck,isn't it?. In the last 2 months I have studied the late war Sd.kfz.251s, and I worked out the camo-map of the factory applied camouflage scheme. I was led to the conclusion, that these vehicle got green for base, so the interior got it too.


kedd, január 26

Sd.Kfz. 251/1 Ausf.D - part 4: Priming the interior and finished 'Hans'

As for the priming, I always use XF-1 flat black from Tamiya. I try to cover all the surfaces, specially the retired corners, which never get the basecoat and the weatherings, and i think its a good pre-shading technic as well.


I surfed on the Internet last week and i found the real Hans! Yes, its true, he was almost bald, just a little hair on his scruff :) And how bizarr, this photo made in Czech,1945.


And here is the miniature Hans. I didn't paint too much details, he will be just a "supporting actor". The flesh-tones are darker than usual, cause he will sit into the cabin, so I calculated with the light conditions.


The next step is to paint the basecoat of the interior...I take a big breath...pics soon :)

kedd, január 19

Sd.Kfz. 234/2 PUMA (prologue)

As I was reading the Panzerwrecks 6. I have found a very good photo of a PUMA from the Ardennes campaigne. I decided that I will built it, and I will built it as much as accurate as I can.
Fortunately the book provides information about the unit that it belonged to. So it seem the vehicle was from the Pz.Aufkl.Abt.2 and formed part of  " Kampfgruppe von Böhm" during Wacht am Rhein.


This Puma has excellent details and challenges for a modeller. The Dragon kit with the aftermarket upgrade sets should do the trick, and of course some scratch build parts if neccessary.

I have started now the building, so pictures will follow shortly.

Cheers,
Aron

1000th pageviews

What a nice, round number! :)
Thanks everybody for the interest, we make models steadfastly!

SCMC members

vasárnap, január 17

BTR-80 Battle of Grozny 1999-2000 (part 2)

I began painting. I have started with primeing the whole vehicle to flat black. The black will help to create shadows in the later stage. I always use Tamiya or Gunze acrylics, because they are create a strong base. I do not like traditional primers, so I don't use tham.


After the primeing I have painted the BTR with valejo acrylics. I used some minor modulation to break the monotonity of the plain green color.


After the modulation I have added the filters with artist oils. And the chipped paint with valejo ss camo black brown.


Next phase will be the painting of the stowage and the mud. Later the figures

szerda, január 13

Sd.Kfz. 251/1 Ausf.D - part 3: 'Hans' the bald driver

Before the paint-work of the interior, and before i glue together the upper and the lower parts, i had to make the driver. Cause i am a fan of Miniart figures, the base came from the 35054 set. I like the poses, and the foldings of the clothes, those are perfect for my taste. 'Hans' almost fit for the driver's place, I just converted the arms, the hands, and the hip. I had to change the head, for a bald one, cause there are not enough space under the roof (which hold the MG above the driver cab). I did not use any details, because he will not visible too much. So, 'Hans' ready for the "life"...


szombat, január 9

Sd.Kfz. 251/1 Ausf.D - part 2: the lower part

 The winter holiday has given me the chance to start my new project. I began the building process with the lower part of the vehicle, cause i have to paint the interior first. The inside of the halftrack is so puritan, I just use some spare PE parts (e.g.: fire-extinguiser bracket, gasmask and MP-40 holder). I must sand the bench, cause it had too deep wood imitation.


I think everybody knows the famous Pakwagen photo from the Panzerwrecks 2. I love it, its a real veteran. We can note the bald tyre, and hard to believe its still working. I sand the left tyre, and i made some damage on the running surface.


On the front plate there is a hole for the crank. The cap of this hole is usually missed, who cared this little thing in the war!? . I drilled the cap and made the 2 small furrow on the sides. This could be a nice detail on the forepart.


The next step will be the driver, because he have to take a seat before i glue together the lower and the uppert side...

péntek, január 1

Sd.Kfz. 251/1 Ausf.D - part 1: the new project

Hi Lads!

First of all, we wish you a happy new year, 2010!

New year --> new project :)
When i built the Panzerwefer42 with MG151, i used the drilling from the Dragon 6217. I think the Dragon should call all of the Sd.Kfz. 251 kits as SMART, because we get all the parts to build a simple Sd.Kfz. 251/1 version.
This is my first Sd.Kfz. 251, and i love it! The original vehicle has a graceful-shape and a great engineering with the wheel and track combination. The model is the usual Dragon quality, nice details, but it need extra work cause of the flash. I have a full metal Friul track set for it, and i will use the Voyager bins and fenders. The interior will build out of the box with spare PE parts.

The story behind this vehicle is "under construction",  but i am sure it will play in May,1945, probably in Czech territory.

One more thing, this model will not base on a real vehicle,but who knows!? I will try to catch little details from a lot of original photos, and i want to show, how can a modeller take inspiration from period pics.

Pictures soon.....................

hétfő, december 14

Rifle Brigade, Sevastopol 1855

The Crimean War and the Siege Of Sevastopol

The Crimean War (October 1853 - February 1856) was fought between the Russian Empire on one side and an alliance of the British Empire, France, the Ottoman Empire and the Kingdom of Sardinia on the other. The war was part of a long-running contest between the major European powers for influence over territories of the declining Ottoman Empire. Most of the conflict took place on the Crimean Peninsula, but there were smaller campaigns in western Turkey, the Baltic Sea, the Pacific Ocean and the White Sea.

In September 1854, Allied troops (British, French and Turkish) landed in the Crimea and besieged the city of Sevastopol, home of the Tsar's Black Sea Fleet which threatened the Mediterranean. The city was captured in September 9, 1855, after about a year-long siege.

The Crimean War is notorious for the logistical and tactical mistakes that plagued both sides. Nonetheless, the war is sometimes considered to be the first modern conflict as it introduced technical changes which affected the future course of warfare, including the first tactical use of railways and the telegraph. It is also famous for the work of Florence Nightingale, who pioneered modern nursing practices while caring for wounded British soldiers. The Crimean War was the first war to be extensively documented in photographs.

Leo Tolstoy wrote a few short sketches on the Siege of Sevastopol, collected in The Sebastopol Sketches. The stories detail the lives of the Russian soldiers and citizens in Sevastopol during the siege. Because of this work, Tolstoy has been called the world's first war correspondent.


The Model


 The official boxart painted by Raul G. Latorre

The kit consists of 5 white metal parts, all pieces are cast to a high quality and the detail in each piece is excellent, very minimal seam lines and no flash. All the parts of the kit are sandwiched between two layers of high density foam in a sturdy cardboard box. A very nice kit for anyone who is interested in this era of history and very well priced.

Next: The base

Béla Illés